Other Obsessions: {Sewing} Valentine's Day Pillowcase Tutorial

Materials:
- Smooth cotton fabrics such as sateen or even bleached muslin. (The smoother, the better);
- your writing/design;
- Adobe Photoshop or other photo-editing software;
- a photocopier;
- Citra-Solv Cleaner;
- a spoon or something to help you rub the print on the fabric;
- disposable cup;
- brush or cotton ball.
- a thin towel to protect your working space
Other things you need: Sewing machine; fabric shears; Optional: Serger; fabric dye pens
In the midst of preparing our home for our firstborn, I forgot to order my husband's gift for Valentine's Day. I already knew what to get, I just forgot to actually place the order. When I eventually remembered, it was too late, and the present was scheduled to arrive 2 days late.
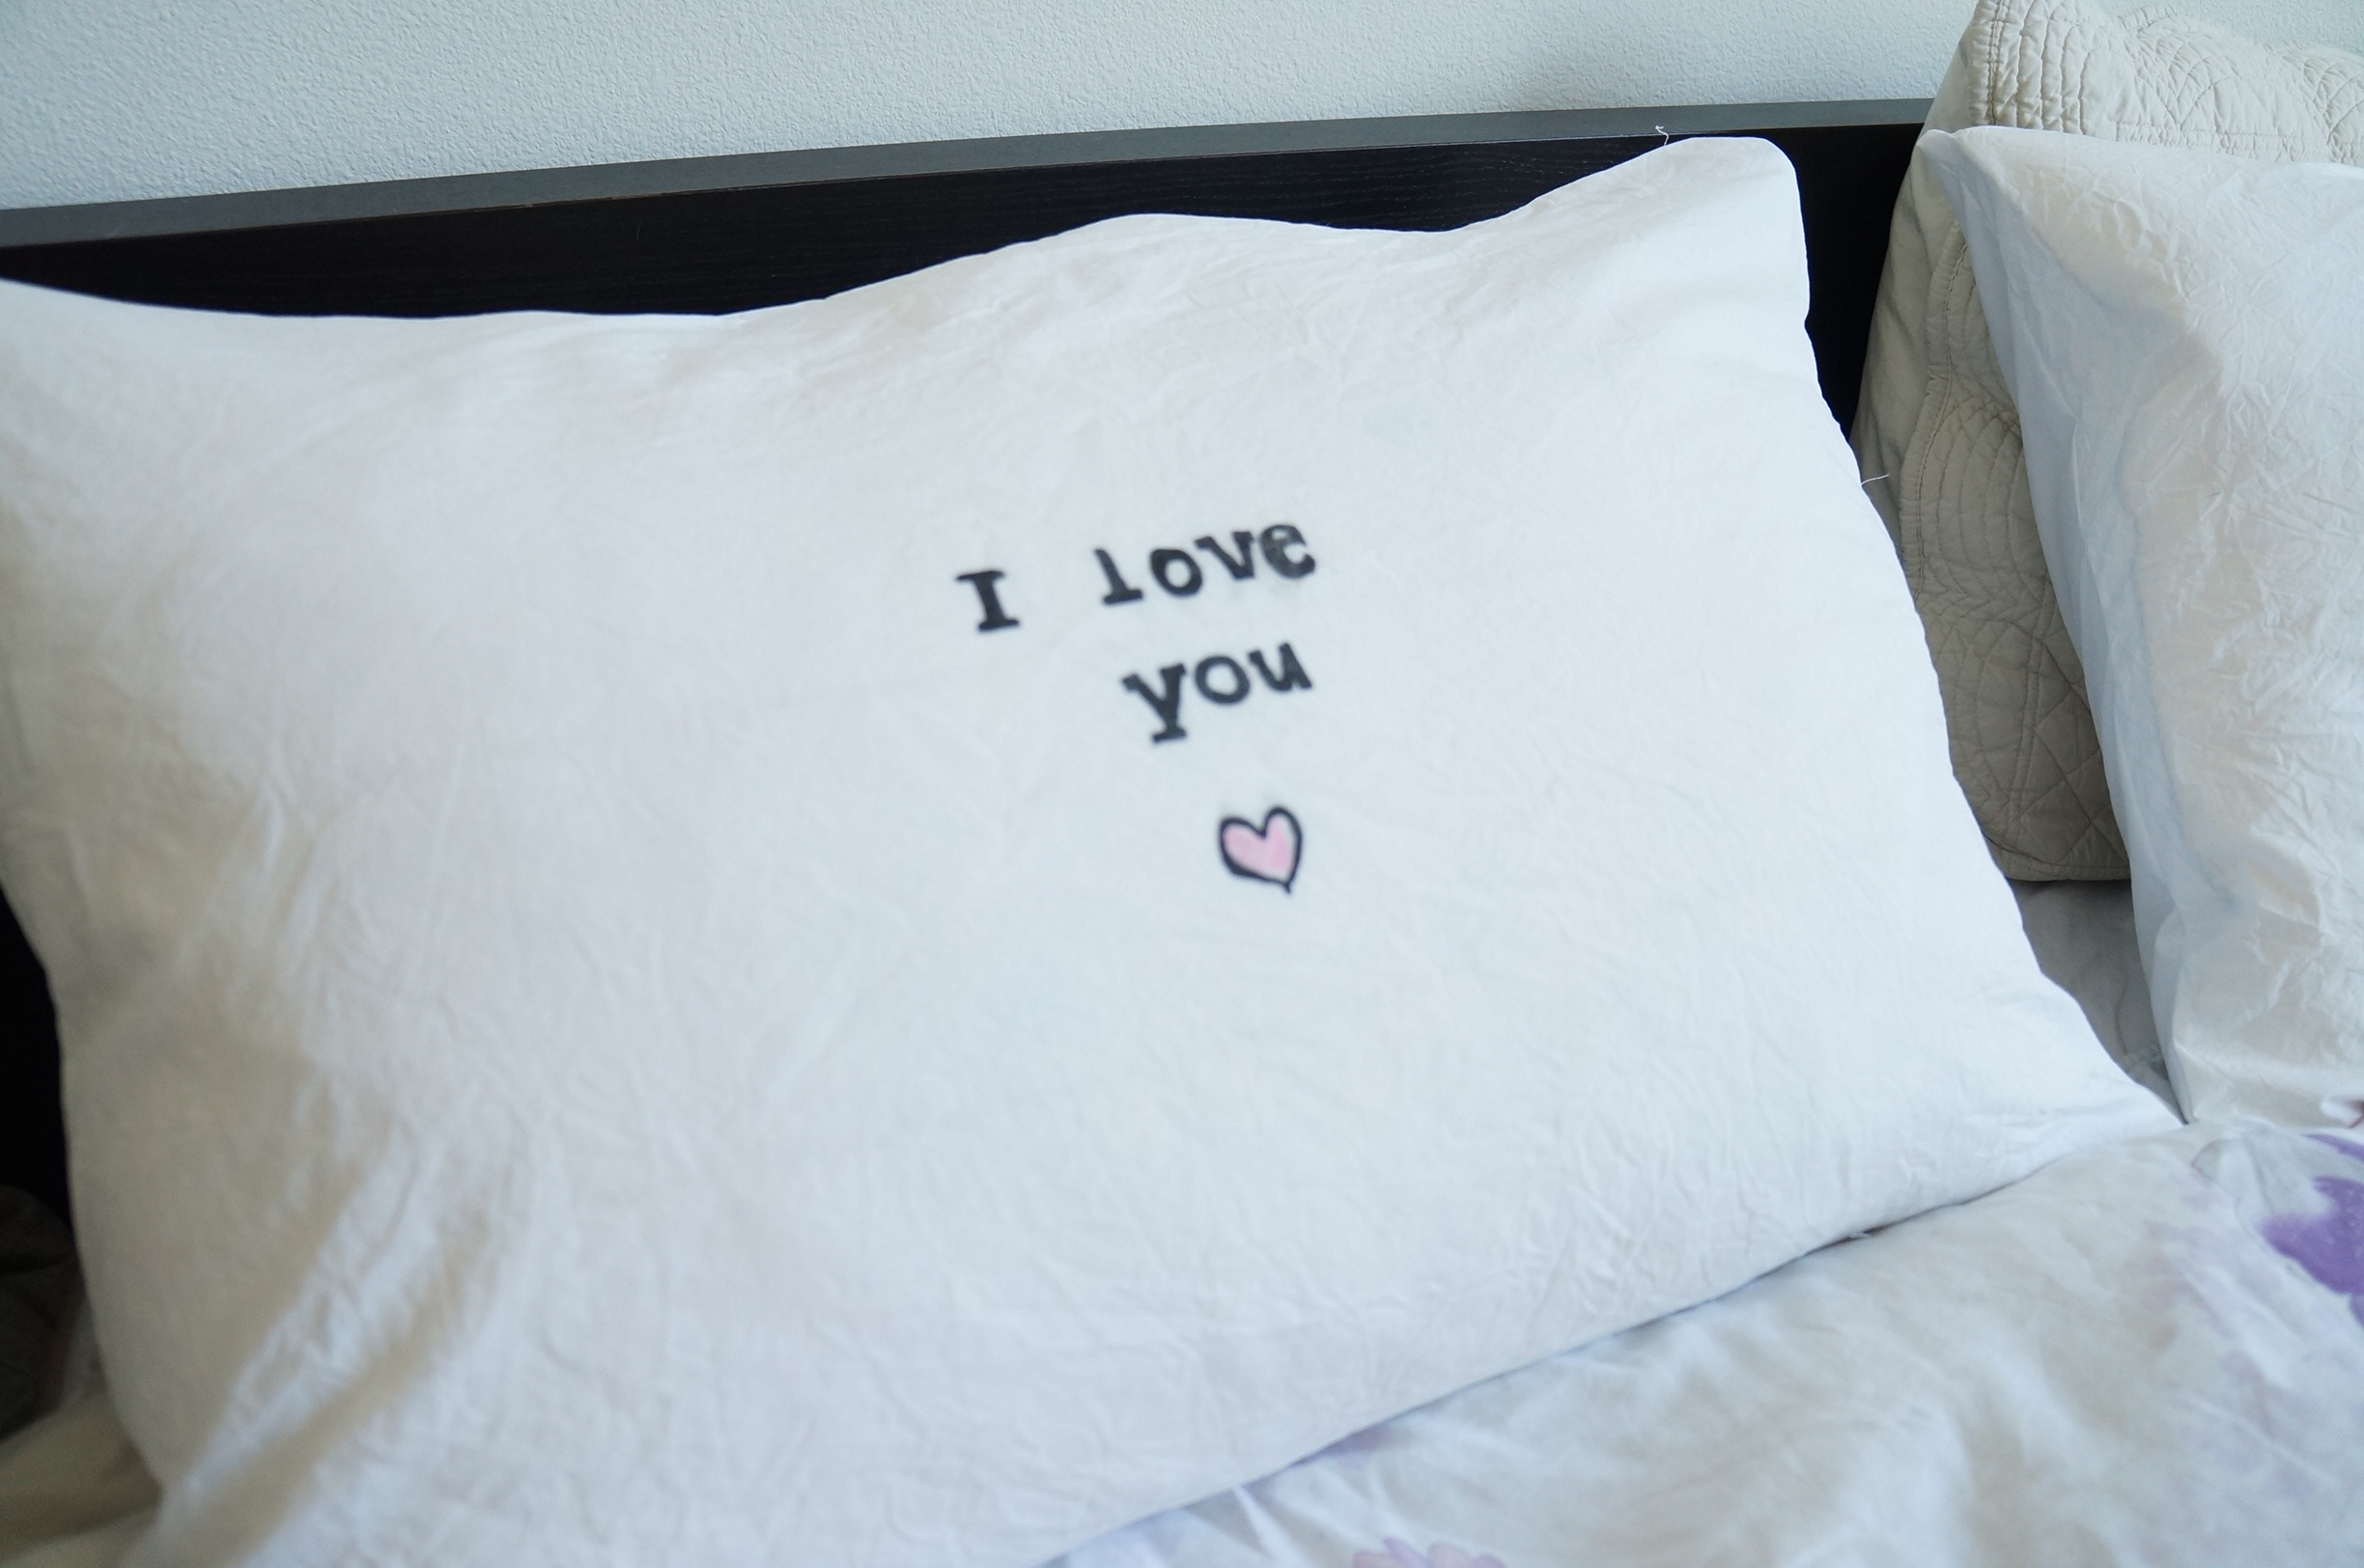
So I thought about surprising him with these simple pillow cases, with the words we say to each other everyday. I experimented with Citra-Solv printing years ago so I had all the materials ready at home, and I wanted to try these new fabric dye pens I got from Dharma Trading last year.
1. I used Gimp (photoshop equivalent) to choose a font, and wrote "I love you" and "I love you more," and added a heart with a brush set I downloaded.
2. I saved them as JPEG files, and then flipped them horizontally to create a mirror image.

3. Print. Then use a Xerox copier or those commercial copy machine to make copies. The printer I have at home is a laser printer and the print did not work. I think it has to be copied on a copy machine for this to work.
4. Cut the fabric first. My measurements were 20" by 30", and added 0.5 on each side for seam allowances. For each pillowcase, I cut 1 of 20.5" by 30.5"; 1 of 20.5" by 25.5"; 1 of 20.5" by 8.5" to make envelope closure back.
5. Pour a little bit of Citra-Solv into the disposable cup. Prepare the workspace (I put a big cutting mat on the table, and then a thin towel to protect the surface), and put the fabric down, with the Right Side facing up.
6. Put the copy of the image/words on top of the fabric, and using a brush or cotton ball, soak the paper with Citra-Solv. You may want to pin the paper onto the fabric.
7. Using the spoon and good amount of elbow grease, print the image/words onto the fabric by rubbing with pressure.
8. Check the progress by lifting the paper carefully.
9. Repeat Step 6 until you're satisfied with the print.
10. Remove the paper (if the fabric is white, you might notice some orange-y tint from Citra-Solv, but it'll wash out).
11. If you want to, you can make the letters or images look more handwritten by using the fabric dye pen and color or trace around the edges. I just used a black dye pen to outline the letters and colored them darker; and used a pink dye pen to color the inside the heart.
12. The dye pens I used did not require heat setting. I simply took the fabrics and wash them in cold water.
13. Sew into pillowcases.
I changed the pillowcases while my husband was still at work on Valentine's Day, so when he came home, he was really surprised! He really thought I wrote the letters by hand and wanted to know how I did it so neatly =P
The variations you can do with this are endless - you could do it on shirts, smaller pillowcases, or skip the whole design/print/copy process and just use stencils with the fabric dye pens.